Installing a mini split air conditioning system in your home can be a transformative upgrade, offering efficient cooling and heating with minimal disruption. Unlike traditional HVAC systems, mini splits do not require extensive ductwork, making them an ideal choice for homeowners looking to enhance comfort without major renovations. This guide provides the essential steps for installing a mini split AC unit, ensuring optimal performance and longevity.
Before beginning installation, it’s crucial to select the right unit size for your space. Mini splits come in various capacities measured in BTUs (British Thermal Units), so choosing the correct size ensures efficiency and effectiveness. An undersized unit will struggle to maintain desired temperatures, while an oversized one may cycle on and off too frequently, wasting energy. Consulting with a professional or using online calculators can help determine the appropriate capacity based on room dimensions and climate.
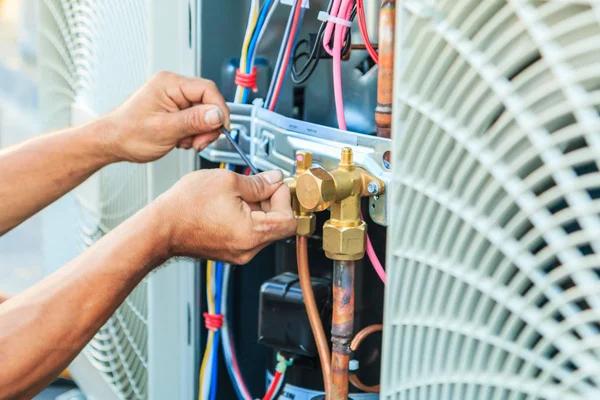
Once you’ve selected the right unit, prepare for installation by gathering necessary tools such as a drill, level, hole saw bit, wrenches, screwdrivers, measuring tape, vacuum pump, refrigerant gauge manifold set, and electrical testers. Safety gear like gloves and goggles is also recommended.
Begin by selecting an indoor wall location that allows unobstructed airflow throughout the room. The indoor unit should ac repair Auburn be mounted at least seven feet above the floor but away from direct sunlight or heat sources which could affect its thermostat readings. Securely attach the mounting bracket to studs within the wall using screws; this ensures stability during operation.
After securing the bracket, carefully hang the indoor unit onto it according to manufacturer instructions. Drill a small hole through the exterior wall behind this location—this will accommodate refrigerant lines connecting indoors to outdoors—ensuring slight downward slope outside prevents water ingress into living spaces.
Next comes outdoor condenser placement: choose flat ground near existing utilities yet clear of obstacles hindering airflow around coils/fans (e.g., plants/debris). Use rubber pads beneath condenser feet if needed leveling adjustments arise due uneven terrain surfaces encountered onsite during setup processes undertaken here accordingly afterward!
Connect copper refrigerant lines between both units via pre-drilled holes previously made earlier inside/outside walls respectively beforehand now finally complete task successfully overall! Ensure all connections are tightened properly then proceed evacuating air/moisture from system utilizing vacuum pump tool mentioned earlier along checklist items prepared ahead time initially planned out thoroughly before starting project itself altogether eventually leading up final stages nearing completion soon thereafter ultimately achieving desired results sought after originally envisioned when first embarking upon journey towards improved climate control solutions entire household alike benefiting greatly long term indeed!